
Printing
Many applications built in Flex let users print from within the application. For example, you might have an application that returns confirmation information after a user completes a purchase. Your application can allow users to print the information on the page to keep for their records.
About printing by using Flex classes
The Flex mx.printing package contains classes that facilitate the creation of printing output from Flex applications:
- FlexPrintJob
-
A class that prints one or more objects. Automatically splits large objects for printing on multiple pages and scales the output to fit the page size.
- PrintDataGrid
-
A subclass of the DataGrid control with a default appearance that is customized for printing. The class includes properties and a method that provide additional sizing and printing features.
- PrintAdvancedDataGrid
-
A subclass of the AdvancedDataGrid control with a default appearance that is customized for printing. The class includes properties and a method that provide additional sizing and printing features.
- PrintOLAPDataGrid
-
A subclass of the OLAPDataGrid control with a default appearance that is customized for printing. The class includes properties and a method that provide additional sizing and printing features.
- FlexPrintJobScaleType
-
Defines constants used in the FlexPrintJob addObject() method.
Together, these classes give you control over how the user prints information from the application. For example, your application can print only a selected subset of the information on the screen, or it can print information that is not being displayed. Also, your application can reformat the information and optimize its layout and appearance for printing.
Using the FlexPrintJob class
You use the FlexPrintJob class to print one or more Flex objects, such as a Form or VBox container. For each object that you specify, Flex prints the object and all objects that it contains. The objects can be all or part of the displayed interface, or they can be components that format data specifically for printing. The FlexPrintJob class lets you scale the output to fit the page, and automatically uses multiple pages to print an object that does not fit on a single page.
You use the FlexPrintJob class to print a dynamically rendered document that you format specifically for printing. This capability is especially useful for rendering and printing such information as receipts, itineraries, and other displays that contain external dynamic content, such as database content and dynamic text.
You often use the FlexPrintJob class within an event listener. For example, you can use a Button control with an event listener that prints some or all of the application.
Build and send a print job
You print output by building and sending a print job.
-
Create an instance of the FlexPrintJob class:
var printJob:FlexPrintJob = new FlexPrintJob();
-
Start the print job:
printJob.start();
This causes the operating system to display a Print dialog box.
-
Add one or more objects to the print job and specify how to scale them:
printJob.addObject(myObject, FlexPrintJobScaleType.MATCH_WIDTH);
Each object starts on a new page.
-
Send the print job to the printer:
printJob.send();
-
Free up any unneeded objects.
The following sections detail the procedures to use in these steps.
Starting a print job
To start a print job, you create an instance of the FlexPrintJob class and call its start() method. This method prompts Flash Player or Adobe® AIR™ to spool the print job to the user's operating system, which causes the user's operating system to display a Print dialog box.
If the user selects an option to begin printing from the Print dialog box, the start() method returns a value of true. If the user cancels the print job, the return value is false. After the user exits the operating system Print dialog box, the start() method uses the printer information to set values for the FlexPrintJob object's pageHeight and pageWidth properties, which represent the dimensions of the printed page area.
Only one print job can be active at a time. You cannot start a second print job until one of the following has happened with the previous print job:
-
The start() method returns a value of false (the job failed).
-
The send() method completes execution following a successful call to the addObject() method. Because the send() method is synchronous, code that follows it can assume that the call completed successfully.
Adding objects to the print job
You use the addObject() method of the FlexPrintJob class to add objects to the print job. Each object starts on a new page; therefore, the following code prints a DataGrid control and a Button control on separate pages:
 printJob.addObject(myDataGrid);
 printJob.addObject(myButton);
Scaling a print job
The scaleType parameter of the addObject() method determines how to scale the output. Use the following FlexPrintJobScaleType class constants to specify the scaling method:
|
Constant |
Action |
|---|---|
|
MATCH_WIDTH |
(Default) Scales the object to fill the available page width. If the resulting object height exceeds the page height, the output spans multiple pages. |
|
MATCH_HEIGHT |
Scales the object to fill the available page height. If the resulting object width exceeds the page width, the output spans multiple pages. |
|
SHOW_ALL |
Scales the object to fit on a single page, filling one dimension; that is, it selects the smaller of the MATCH_WIDTH or MATCH_HEIGHT scale types. |
|
FILL_PAGE |
Scales the object to fill at least one page completely; that is, it selects the larger of the MATCH_WIDTH or MATCH_HEIGHT scale types. |
|
NONE |
Does not scale the output. The printed page has the same dimensions as the object on the screen. If the object height, width, or both dimensions exceed the page width or height, the output spans multiple pages. |
If an object requires multiple pages, the output splits at the page boundaries. This can result in unreadable text or inappropriately split graphics. For information on how to format your print job to avoid these problems, see Printing multipage output.
The FlexPrintJob class includes two properties that can help your application determine how to scale the print job. These properties are read-only and are initially 0. When the application calls the start() method and the user selects the Print option in the operating system Print dialog box, Flash Player or AIR retrieves the print settings from the operating system. The start() method populates the following properties:
|
Property |
Type |
Unit |
Description |
|---|---|---|---|
|
pageHeight |
Number |
Points |
Height of the printable area on the page; does not include any user-set margins. |
|
pageWidth |
Number |
Points |
Width of the printable area on the page; does not include any user-set margins. |
Completing the print operation
To send the print job to a printer after using the FlexPrintJob addObject() method, use the send() method, which causes Flash Player or AIR to stop spooling the print job so that the printer starts printing.
After sending the print job to a printer, if you use print-only components to format output for printing, call removeChild() to remove the print-specific component. For more information, see Using a print-specific output format.
Example: A simple print job
The following example prints a DataGrid object exactly as it appears on the screen, without scaling:
<?xml version="1.0"?>
<!-- printing\DGPrint.mxml -->
<s:Application xmlns:fx="http://ns.adobe.com/mxml/2009"
    xmlns:s="library://ns.adobe.com/flex/spark"
    xmlns:mx="library://ns.adobe.com/flex/mx">

    <fx:Script>
        <![CDATA[
            import mx.printing.*;

            // Create a PrintJob instance.
            private function doPrint():void {
                // Create an instance of the FlexPrintJob class.
                var printJob:FlexPrintJob = new FlexPrintJob();

                // Start the print job.
                if (printJob.start() != true) return;

                // Add the object to print. Do not scale it.
                printJob.addObject(myDataGrid, FlexPrintJobScaleType.NONE);

                // Send the job to the printer.
                printJob.send();
            }
        ]]>
    </fx:Script>

    <mx:VBox id="myVBox">
        <mx:DataGrid id="myDataGrid" width="300">
            <mx:dataProvider>
                <fx:Object Product="FlexJS" Code="1000"/>
                <fx:Object Product="Flex" Code="2000"/>
                <fx:Object Product="TourDeFlex" Code="3000"/>
                <fx:Object Product="Installer" Code="4000"/>
            </mx:dataProvider>
        </mx:DataGrid>
        <mx:Button id="myButton"
            label="Print"
            click="doPrint();"/>
    </mx:VBox>
</s:Application>
In this example, selecting the Button control invokes the doPrint() event listener. The event listener creates an instance of the FlexPrintJob class to print the DataGrid control, adds the DataGrid control to the print job using the addObject() method, and then uses the send() method to print the page.
To print the DataGrid and Button controls on your page, specify myVBox, the ID of the object that contains both controls, in the addObject() method's object parameter. If want to print the DataGrid and Button controls on separate pages, specify each object in a separate addObject() method.
To print the DataGrid control so that it spans the page width, omit the second addObject() method parameter, or specify FlexPrintJobScaleType.MATCH_WIDTH. To print the DataGrid control with the largest size that fits on a single page, specify FlexPrintJobScaleType.SHOW_ALL. In the previous example, FlexPrintJobScaleType.SHOW_ALL has the same result as FlexPrintJobScaleType.MATCH_WIDTH because the DataGrid is short.
Print containers with a transparent background
Many Flex containers, such as the Spark Group and MX Box containers, are transparent by default. If you print a transparent container, the background color of anything behind the transparent container prints.
As an alternative to the Spark Group container, use a Spark BorderContainer or a SkinnableContainer with the backgroundColor property set. You can also define another container behind the Group with the appropriate background color. Or, set the backgroundColor property of the Application container.
For the MX Box and other containers, make sure to set the backgroundColor property.
Using a print-specific output format
In most cases, you do not want your printed output to look like the screen display. The screen might use a horizontally oriented layout that is not appropriate for paper printing. You might have display elements on the screen that would be distracting in a printout. You might also have other reasons for wanting the printed and displayed content to differ; for example, you might want to omit a password field.
To print your output with print-specific contents and appearance, use separate objects for the screen layout and the print layout, and share the data used in the screen layout with the print layout. You then use the print layout in your call or calls to the FlexPrintJob addObject() method.
If your form includes a DataGrid, AdvancedDataGrid, or OLAPDataGrid control, use the PrintDataGrid, PrintAdvancedDataGrid, PrintOLAPDataGrid or control in your print layout. The print version of these controls have two advantages over the normal controls for printed output:
-
It has a default appearance that is designed specifically for printing.
-
It has properties and methods that support printing grids that contain multiple pages of data.
The code in the next section uses a short PrintDataGrid control. For more information on using the PrintDataGrid control, see Using the PrintDataGrid control for multipage grids. For more information on using the PrintAdvancedDataGrid and PrintOLAPDataGrid control, see Using the PrintAdvancedDataGrid control.
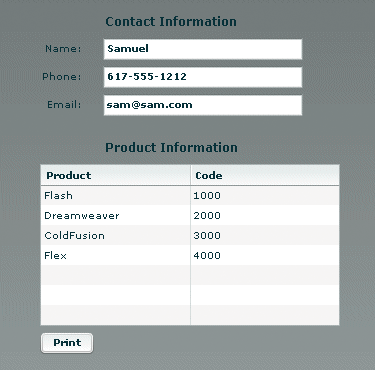
Example: A simple print-specific output format
This example creates a Flex form with three text boxes for entering contact information, and a data grid that displays several lines of product information. The following image shows how the output of this application looks on the screen:
The following image shows how the output looks when the user clicks the Print button to print the data:
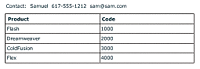
In this example, the MXML application file displays the screen and controls the printing. A separate custom MXML component defines the appearance of the printed output.
When the user clicks the Print button, the application's doPrint() method does the following things:
-
Creates and starts the print job to display the operating system's Print dialog box.
-
After the user starts the print operation in the Print dialog box, creates a child control using the myPrintView component.
-
Sets the MyPrintView control's data from the form data.
-
Sends the print job to the printer.
-
Cleans up memory by removing the print-specific child component.
The printed output does not include the labels from the screen, and the application combines the text from the screen's three input boxes into a single string for printing in a Label control.
The following code shows the contents of the application file:
<?xml version="1.0"?>
<!-- printing\DGPrintCustomComp.mxml -->
<s:Application xmlns:fx="http://ns.adobe.com/mxml/2009"
    xmlns:s="library://ns.adobe.com/flex/spark"
    xmlns:mx="library://ns.adobe.com/flex/mx"
    height="450" width="600">

    <fx:Script>
        <![CDATA[
            import mx.printing.FlexPrintJob;
            import myComponents.MyPrintView;

            public function doPrint():void {
                // Create a FlexPrintJob instance.
                var printJob:FlexPrintJob = new FlexPrintJob();

                // Start the print job.
                if(printJob.start()) {
                    // Create a MyPrintView control as a child
                    // of the current view.
                    var formPrintView:MyPrintView = new MyPrintView();
                    addElement(formPrintView);

                    // Populate the print control's contact label
                    // with the text from the form's name,
                    // phone, and e-mail controls.
                    formPrintView.contact.text =
                        "Contact: " + custName.text + "  " +
                        custPhone.text + "  " + custEmail.text;

                    // Set the print control's data grid data provider to be
                    // the displayed data grid's data provider.
                    formPrintView.myDataGrid.dataProvider =
                        myDataGrid.dataProvider;

                    // Add the SimplePrintview control to the print job.
                    // For comparison, try setting the
                    // second parameter to "none".
                    printJob.addObject(formPrintView);

                    // Send the job to the printer.
                    printJob.send();

                    // Remove the print-specific control to free memory.
                    removeElement(formPrintView);
                }
            }
        ]]>
    </fx:Script>

    <!-- The form to display-->
    <mx:Form id="myForm">
        <mx:FormHeading label="Contact Information"/>
        <mx:FormItem label="Name: ">
            <mx:TextInput id="custName"
                width="200"
                text="Samuel Smith"
                fontWeight="bold"/>
        </mx:FormItem>
        <mx:FormItem label="Phone: ">
            <mx:TextInput id="custPhone"
                width="200"
                text="617-555-1212"
                fontWeight="bold"/>
        </mx:FormItem>
        <mx:FormItem label="Email: ">
            <mx:TextInput id="custEmail"
                width="200"
                text="sam@sam.com"
                fontWeight="bold"/>
        </mx:FormItem>

        <mx:FormHeading label="Product Information"/>
        <mx:DataGrid id="myDataGrid" width="300">
            <mx:dataProvider>
                <fx:Object Product="FlexJS" Code="1000"/>
                <fx:Object Product="Flex" Code="2000"/>
                <fx:Object Product="TourDeFlex" Code="3000"/>
                <fx:Object Product="Installer" Code="4000"/>
            </mx:dataProvider>
        </mx:DataGrid>
        <mx:Button id="myButton"
            label="Print"
            click="doPrint();"/>
    </mx:Form>
</s:Application>
The following MyPrintView.mxml file defines the component used by the application's doPrint() method. The component is a VBox container; it contains a Label control, into which the application writes the contact information from the first three fields of the form, and a PrintDataGrid control, which displays the data from the data source of the screen view's DataGrid control. For more information on the PrintDataGrid control and its advantages for printing, see Using the PrintDataGrid control for multipage grids.
<?xml version="1.0"?>
<!-- printing\myComponents\MyPrintView.mxml -->
<mx:VBox xmlns:fx="http://ns.adobe.com/mxml/2009"
    xmlns:s="library://ns.adobe.com/flex/spark"
    xmlns:mx="library://ns.adobe.com/flex/mx"
    backgroundColor="#FFFFFF"
    height="300" width="500"
    paddingTop="50" paddingLeft="50" paddingRight="50">

    <!-- The controls to print, a label and a PrintDataGrid control. -->
    <mx:Label id="contact"/>
    <mx:PrintDataGrid id="myDataGrid" width="100%">
        <mx:columns>
            <mx:DataGridColumn dataField="Product"/>
            <mx:DataGridColumn dataField="Code"/>
        </mx:columns>
    </mx:PrintDataGrid>
</mx:VBox>
Printing multipage output
You can print well-formatted multipage output under the following conditions:
-
When each control fits on a print page or less. You often encounter such jobs when printing a form with fixed-length fields.
-
When the printed output includes one or more PrintDataGrid controls that are too long to print on a single page, particularly if the control height might vary, depending on the data. A good example of this type of output is a customer order receipt, which starts with the customer information, has an indeterminate number of order line items, and ends with total information.
Printing known-length multipage output
If you know the length of each component in a multipage document, you can create a separate print layout component for each page you print, and specify each layout page in a separate addObject() method, as follows:
 printJob.addObject(introPrintView, "ShowAll");
 printJob.addObject(finDetailPrintView, "ShowAll");
 printJob.addObject(hrDetailPrintView, "ShowAll");
 printJob.addObject(summaryPrintView, "ShowAll");
Using the PrintDataGrid control for multipage grids
When a DataGrid control with many rows does not fit on a single screen in your application, you typically have scroll bars that let users view all the data. When you print the DataGrid control, the output is the same as the screen display. Therefore, if your DataGrid control has rows or columns that are not immediately visible, they do not print. If you replace the DataGrid control with a PrintDataGrid control that does not have a height specified (or has a large height), you print all the rows, but some rows could be partially printed on the bottom of one page and partially printed at the top of another, as you often see with HTML printout.
You can solve these problems by using the following features of the PrintDataGrid control. These features let you correctly print grids that contain multiple pages of data without splitting rows across pages:
- sizeToPage property
-
Makes the printed data grid contain only full rows.
- nextPage() method
-
Gets the next printable page of data.
- validNextPage property
-
Is true if printing the data requires an additional page.
Using the sizeToPage attribute to format pages
A PrintDataGrid page consists of the rows that are visible in the control's current view. Suppose, for example, that a PrintDataGrid control has a height of 130 pixels. The total height of each row and header is 30 pixels, and the control's data provider has 10 rows. In this situation, the printed PrintDataGrid page contains only three complete data rows, plus the header. The sizeToPage property specifies whether to include a fourth and partial data row.
The sizeToPage property, which is true by default, causes the PrintDataGrid control to remove any partially visible or empty rows and to resize itself to include only complete rows in the current view. For the data grid described in the preceding paragraph, when this property is true, the DataGrid shrinks to show three complete data rows, and no incomplete rows; if the attribute is false, the grid includes a partial row at the bottom.
The following properties provide information on page sizing that are affected by the sizeToPage property:
|
Property |
Description |
|---|---|
currentPageHeight |
Contains the height of the grid, in pixels, that results if the sizeToPage property is true. If the sizeToPage property is true, the currentPageHeight property equals the height property. |
originalHeight |
Contains the grid height that results if the sizeToPage property is false. If the sizeToPage property is false, the originalHeight property equals the height property. |
In most applications, you leave the sizeToPage attribute at its default value (true), and use the height property to determine the grid height.
The sizeToPage property does not affect the way the page breaks when a single PrintDataGrid control page is longer than a print page. To print multipage data grids without splitting rows, you must divide the grid items into multiple views by using the nextPage() method, as described in the following section.
Using the nextPage() method and validNextPage property to print multiple pages
The validNextPage property is true if the PrintDataGrid control has data beyond the rows that fit on the current print page. You use it to determine whether you need to format and print an additional page.
The nextPage() method lets you page through the data provider contents by setting the first row of the PrintDataGrid control to be the data provider row that follows the last row of the previous PrintDataGrid page. In other words, the nextPage() method increases the grid's verticalScrollPosition property by the value of the grid's rowCount property.
The following code shows a loop that prints a grid using multiple pages, without having rows that span pages:
 // Queue the first page.
 printJob.addObject(thePrintView);
 // While there are more pages, print them.
 while (thePrintView.myDataGrid.validNextPage) {
 	//Put the next page of data in the view.
 	thePrintView.myDataGrid.nextPage();
 	//Queue the additional page.
 	printJob.addObject(thePrintView);
 }
The section Example: Printing with multipage PrintDataGrid controls shows how to use the nextPage() method to print a report with a multipage data grid.
Updating the PrintDataGrid layout
When you use a PrintDataGrid control to print a single data grid across multiple pages, you queue each page of the grid individually. If your application customizes each page beyond simply using the nextPage() method to page through the PrintDataGrid, you must call the validateNow() method to update the page layout before you print each page, as shown in Print output component.
Example: Printing with multipage PrintDataGrid controls
The following example prints a data grid in which you can specify the number of items in the data provider. You can, therefore, set the DataGrid control contents to print on one, two, or more pages, so that you can see the effects of different-sized data sets on the printed result.
The example also shows how you can put header information before the grid and footer information after the grid, as in a shipping list or receipt. It uses the technique of selectively showing and hiding the header and footer, depending on the page being printed. To keep the code as short as possible, the example uses simple placeholder information only.
The application consists of the following files:
-
The application file displays the form to the user, including TextArea and Button controls to set the number of lines and a Print button. The file includes the code to initialize the view, get the data, and handle the user's print request. It uses the FormPrintView MXML component as a template for the printed output.
-
The FormPrintView.mxml file formats the printed output. It has two major elements:
-
The print output template includes the PrintDataGrid control and uses two MXML components to format the header and footer contents.
-
The showPage() function determines which sections of the template to include in a particular page of the output, based on the page type: first, middle, last, or single. On the first page of multipage output, the showPage() function hides the footer; on the middle and last pages, it hides the header. On a single page, it shows both header and footer.
-
-
The FormPrintHeader.mxml and formPrintFooter.mxml files specify the contents of the start and the end of the output. To keep the application simple, the header has a single, static Label control. The footer displays a total of the numbers in the Quantity column. In a more complete application, the header page could have, for example, a shipping address, and the footer page could show more detail about the shipment totals.
The files include detailed comments explaining the purpose of the code.
Multipage print application file
The following code shows the multipage print application file:
<?xml version="1.0"?>
<!-- printing\MultiPagePrint.mxml -->
<s:Application xmlns:fx="http://ns.adobe.com/mxml/2009"
    xmlns:s="library://ns.adobe.com/flex/spark"
    xmlns:mx="library://ns.adobe.com/flex/mx"
    initialize="initData();">

    <fx:Script>
    <![CDATA[
        import mx.printing.*;
        import mx.collections.ArrayCollection;
        // Import the MXML custom print view control.
        import myComponents.FormPrintView;

        // Declare variables and initialize simple variables.
        // The dgProvider ArrayCollection is the DataGrid data provider.
        // It must be bindable because you change its contents dynamically.
        [Bindable]
        public var dgProvider:ArrayCollection;
        public var footerHeight:Number = 20;
        public var prodIndex:Number;
        public var prodTotal:Number = 0;

        // Data initialization, called when the application initializes.
        public function initData():void {
            // Create the data provider for the DataGrid control.
            dgProvider = new ArrayCollection;
        }

        // Fill the dgProvider ArrayCollection with the specified items.
        public function setdgProvider(items:int):void {
            // First initialize the index and clear any existing data.
            prodIndex=1;
            dgProvider.removeAll();

            // Fill the ArrayCollection, and calculate a product total.
            // For simplicity, it increases the Index field value by
            // 1, and the Qty field by 7 for each item.
            for (var z:int=0; z<items; z++)
            {
                var prod1:Object = {};
                prod1.Qty = prodIndex * 7;
                prod1.Index = prodIndex++;
                prodTotal += prod1.Qty;
                dgProvider.addItem(prod1);
            }
        }

        // The function to print the output.
        public function doPrint():void {
            // Create a FlexPrintJob instance.
            var printJob:FlexPrintJob = new FlexPrintJob();

            // Start the print job.
            if (printJob.start()) {
                // Create a FormPrintView control
                // as a child of the application.
                var thePrintView:FormPrintView = new FormPrintView();
                addElement(thePrintView);

                // Set the print view properties.
                thePrintView.width=printJob.pageWidth;
                thePrintView.height=printJob.pageHeight;
                thePrintView.prodTotal = prodTotal;

                // Set the data provider of the FormPrintView
                // component's DataGrid to be the data provider of
                // the displayed DataGrid.
                thePrintView.myDataGrid.dataProvider =
                    myDataGrid.dataProvider;

                // Create a single-page image.
                thePrintView.showPage("single");

                // If the print image's DataGrid can hold all the
                // data provider's rows, add the page to the print job.
                if(!thePrintView.myDataGrid.validNextPage)
                {
                    printJob.addObject(thePrintView);
                }
                // Otherwise, the job requires multiple pages.
                else
                {
                    // Create the first page and add it to the print job.
                    thePrintView.showPage("first");
                    printJob.addObject(thePrintView);
                    thePrintView.pageNumber++;

                    // Loop through the following code
                    // until all pages are queued.
                    while(true)
                    {
                        // Move the next page of data to the top of
                        // the PrintDataGrid.
                        thePrintView.myDataGrid.nextPage();

                        // Try creating a last page.
                        thePrintView.showPage("last");
                        // If the page holds the remaining data, or if
                        // the last page was completely filled by the last
                        // grid data, queue it for printing.
                        // Test if there is data for another
                        // PrintDataGrid page.
                        if(!thePrintView.myDataGrid.validNextPage)
                        {
                            // This is the last page;
                            // queue it and exit the print loop.
                            printJob.addObject(thePrintView);
                            break;
                        }
                        else
                        // This is not the last page. Queue a middle page.
                        {
                            thePrintView.showPage("middle");
                            printJob.addObject(thePrintView);
                            thePrintView.pageNumber++;
                        }
                    }
                }
                // All pages are queued; remove the FormPrintView
                // control to free memory.
                removeElement(thePrintView);
            }
            // Send the job to the printer.
            printJob.send();
        }
    ]]>
    </fx:Script>

    <!-- The form that appears on the user's system.-->
    <mx:Form id="myForm" width="80%">
        <mx:FormHeading label="Product Information"/>
                <mx:DataGrid id="myDataGrid" dataProvider="{dgProvider}">
                <mx:columns>
                    <mx:DataGridColumn dataField="Index"/>
                    <mx:DataGridColumn dataField="Qty"/>
                </mx:columns>
            </mx:DataGrid>
        <mx:Text width="100%"
            text="Specify the number of lines and click Fill Grid first.
            Then you can click Print."/>
        <mx:TextInput id="dataItems" text="35"/>
        <mx:HBox>
            <mx:Button id="setDP"
                label="Fill Grid"
                click="setdgProvider(int(dataItems.text));"/>
            <mx:Button id="printDG"
                label="Print"
                click="doPrint();"/>
        </mx:HBox>
    </mx:Form>
</s:Application>
Print output component
The following lines show the FormPrintView.mxml custom component file:
<?xml version="1.0"?>
<!-- printing\myComponents\FormPrintView.mxml -->
<mx:VBox xmlns:fx="http://ns.adobe.com/mxml/2009"
    xmlns:s="library://ns.adobe.com/flex/spark"
    xmlns:mx="library://ns.adobe.com/flex/mx"
    xmlns:MyComp="myComponents.*"
    backgroundColor="#FFFFFF"
    paddingTop="50" paddingBottom="50" paddingLeft="50">

    <fx:Script>
        <![CDATA[
            import mx.core.*

            // Declare and initialize the variables used in the component.
            // The application sets the actual prodTotal value.
            [Bindable]
            public var pageNumber:Number = 1;
            [Bindable]
            public var prodTotal:Number = 0;

            // Control the page contents by selectively hiding the header and
            // footer based on the page type.
            public function showPage(pageType:String):void {
                if(pageType == "first" || pageType == "middle") {
                    // Hide the footer.
                    footer.includeInLayout=false;
                    footer.visible = false;
                }
                if(pageType == "middle" || pageType == "last") {
                    // The header won't be used again; hide it.
                    header.includeInLayout=false;
                    header.visible = false;
                }
                if(pageType == "last") {
                    // Show the footer.
                    footer.includeInLayout=true;
                    footer.visible = true;
                }
                //Update the DataGrid layout to reflect the results.
                validateNow();
            }
        ]]>
    </fx:Script>

    <!-- The template for the printed page,
        with the contents for all pages. -->
    <mx:VBox width="80%" horizontalAlign="left">
        <mx:Label text="Page {pageNumber}"/>
    </mx:VBox>
    <MyComp:FormPrintHeader id="header"/>

    <!-- The sizeToPage property is true by default, so the last
        page has only as many grid rows as are needed for the data. -->
    <mx:PrintDataGrid id="myDataGrid" width="60%" height="100%">
    <!-- Specify the columns to ensure that their order is correct. -->
        <mx:columns>
            <mx:DataGridColumn dataField="Index" />
            <mx:DataGridColumn dataField="Qty" />
        </mx:columns>
    </mx:PrintDataGrid>

    <!-- Create a FormPrintFooter control
        and set its prodTotal variable. -->
    <MyComp:FormPrintFooter id="footer" pTotal="{prodTotal}"/>
</mx:VBox>
Header and footer files
The following lines show the FormPrintHeader.mxml file.
<?xml version="1.0"?>
<!-- printing\myComponents\FormPrintHeader.mxml -->
<mx:VBox xmlns:fx="http://ns.adobe.com/mxml/2009"
    xmlns:s="library://ns.adobe.com/flex/spark"
    xmlns:mx="library://ns.adobe.com/flex/mx"
    width="60%"
    horizontalAlign="right" >

    <mx:Label text="This is a placeholder for first page contents"/>
</mx:VBox>
The following lines show the FormPrintFooter.mxml file:
<?xml version="1.0"?>
<!-- printing\myComponents\FormPrintFooter.mxml -->
<mx:VBox xmlns:fx="http://ns.adobe.com/mxml/2009"
    xmlns:s="library://ns.adobe.com/flex/spark"
    xmlns:mx="library://ns.adobe.com/flex/mx"
    width="60%"
    horizontalAlign="right">

    <!-- Declare and initialize the product total variable. -->
    <fx:Script>
        <![CDATA[
            [Bindable]
            public var pTotal:Number = 0;
        ]]>
        </fx:Script>

    <mx:Label text="Product Total: {pTotal}"/>
</mx:VBox>
Using the PrintAdvancedDataGrid control
The PrintAdvancedDataGrid and PrintOLAPDataGrid controls provide the same functionality for the AdvancedDataGrid and OLAPDataGrid controls as the PrintDataGrid control does for the DataGrid control. For more information, see Using the PrintDataGrid control for multipage grids.
The following example uses the PrintAdvancedDataGrid control to print an instance of the AdvancedDataGrid control.
<?xml version="1.0"?>
<!-- printing\ADGPrint.mxml -->
<s:Application xmlns:fx="http://ns.adobe.com/mxml/2009"
    xmlns:s="library://ns.adobe.com/flex/spark"
    xmlns:mx="library://ns.adobe.com/flex/mx">

    <fx:Script>
        <![CDATA[
            import mx.printing.*;
            import mx.collections.ArrayCollection;
            import mx.printing.PrintAdvancedDataGrid;

            include "SimpleHierarchicalData.as";

            // Create a PrintJob instance.
            private function doPrint():void {
                // Create an instance of the FlexPrintJob class.
                var printJob:FlexPrintJob = new FlexPrintJob();

                // Initialize the PrintAdvancedDataGrid control.
                var printADG:PrintAdvancedDataGrid =
                    new PrintAdvancedDataGrid();
                // Exclude the PrintAdvancedDataGrid control from layout.
                printADG.includeInLayout = false;
                printADG.source = adg;

                // Add the print-specific control to the application.
                addElement(printADG);

                // Start the print job.
                if (printJob.start() == false) {
                    // User cancelled print job.
                    // Remove the print-specific control to free memory.
                    removeElement(printADG);
                    return;
                }

                // Add the object to print. Do not scale it.
                printJob.addObject(printADG, FlexPrintJobScaleType.NONE);

                // Send the job to the printer.
                printJob.send();

                // Remove the print-specific control to free memory.
                removeElement(printADG);
            }
        ]]>
    </fx:Script>

    <mx:VBox id="myVBox"
        width="100%" height="100%">
        <mx:AdvancedDataGrid id="adg"
            width="100%" height="100%">
            <mx:dataProvider>
                <mx:HierarchicalData source="{dpHierarchy}"/>
            </mx:dataProvider>
            <mx:columns>
                <mx:AdvancedDataGridColumn dataField="Region"/>
                <mx:AdvancedDataGridColumn dataField="Territory_Rep"
                    headerText="Territory Rep"/>
                <mx:AdvancedDataGridColumn dataField="Actual"/>
                <mx:AdvancedDataGridColumn dataField="Estimate"/>
            </mx:columns>
        </mx:AdvancedDataGrid>
        <mx:Button id="myButton"
            label="Print"
            click="doPrint();"/>
    </mx:VBox>
</s:Application>
[Bindable]
private var dpHierarchy:ArrayCollection = new ArrayCollection([
  {Region:"Southwest", children: [
     {Region:"Arizona", children: [
        {Territory_Rep:"Barbara Jennings", Actual:38865, Estimate:40000},
        {Territory_Rep:"Dana Binn", Actual:29885, Estimate:30000}]},
     {Region:"Central California", children: [
        {Territory_Rep:"Joe Smith", Actual:29134, Estimate:30000}]},
     {Region:"Nevada", children: [
        {Territory_Rep:"Bethany Pittman", Actual:52888, Estimate:45000}]},
     {Region:"Northern California", children: [
        {Territory_Rep:"Lauren Ipsum", Actual:38805, Estimate:40000},
        {Territory_Rep:"T.R. Smith", Actual:55498, Estimate:40000}]},
     {Region:"Southern California", children: [
        {Territory_Rep:"Alice Treu", Actual:44985, Estimate:45000},
        {Territory_Rep:"Jane Grove", Actual:44913, Estimate:45000}]}
  ]}
]);
This example uses the PrintAdvancedDataGrid.source property to initialize the PrintAdvancedDataGrid control from the AdvancedDataGrid control.
To support the AdvancedDataGrid control, the PrintAdvancedDataGrid control adds the following properties not available in the PrintDataGrid control:
|
Property |
Description |
|---|---|
allowInteractions |
If true, allow some interactions with the control, such as column resizing, column reordering, and expanding or collapsing nodes. The default value is false. |
displayIcons |
If true, display the folder and leaf icons in the navigation tree. The default value is true. |
source |
Initialize the PrintAdvancedDataGrid control and all of its properties from the specified AdvancedDataGrid control. |
validPreviousPage |
Indicates that the data provider contains data rows that precede the rows that the PrintAdvancedDataGrid control currently displays. |
Navigation
Adobe, Adobe AIR, Adobe Flash, Adobe Flash Platform and Adobe Flash Player are either registered trademarks or trademarks of Adobe Systems Incorporated in the United States and/or other countries and are used by permission from Adobe. No other license to the Adobe trademarks are granted.